Happy Easter from dosLHAMAS!
- Sofie Amalie Højgaard Lemche
- 4. apr. 2021
- 2 min læsning
Opdateret: 16. apr. 2021
Do(e)s Lhamas rest? No they don't. While you have been taking a well deserved Easter Break, the Lhamas have been grinding and working hard on the locker project.

For the ongoing project work we wanted to work smart. This meant that we needed to connect the Nodered code with the Arduino code, in order for them to correlate.
NodeRed
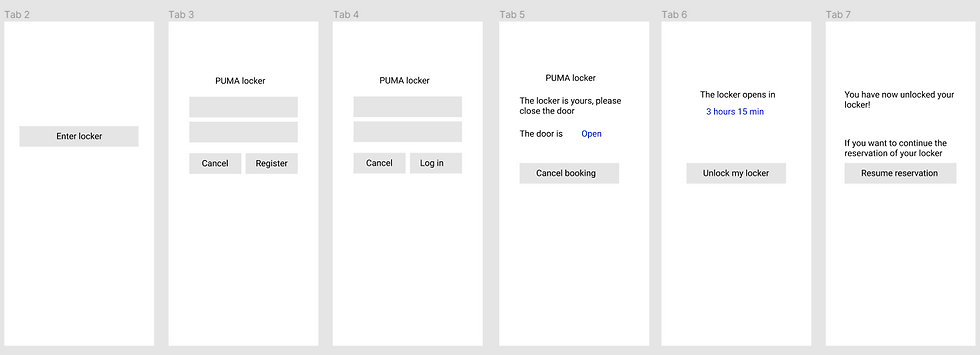
After reviewing our latest mock-up of the UI, it became clear that we needed to make a much simpler layout. It was decided that there would be an individual registration page and booking site for each locker, which the user would enter by a QR code on each locker.
We did a new wireframing of the UI, and made the name of the tabs correspond to the Nodered tabs. The wireframing can be viewed below. In this way we had a visual of the UI which helped us when creating the booking flow in Nodered.
We encountered some obstacles when developing the booking infrastructure, one of them being sending the confirmation email to the user as soon as the locker has been successfully booked. After a bit of discussion we found a NodeRed library, that allowed us to send mails from a gmail-account. By injecting this node with a message, we can in this message define the recipient, the subject and the test. In this way the code would send a confirmation to the mail which the user registered in the sign-up.
As we were relying on the locker "door" to open and close (currently a physical button on the Arduino board) in order to move through the UI booking flow, we had to make manual input buttons in the NodeRed flow. This was a bit elaborate, but necessary for us to do regression testing and ensure that the NodeRed structure would work.
Arduino
At the same time, we continued on the Arduino side. A button was quickly added with the purpose of registering if the door on the locker is closed - if so, the MCU sends a message to NodeRed stating the door is closed so it can be locked.
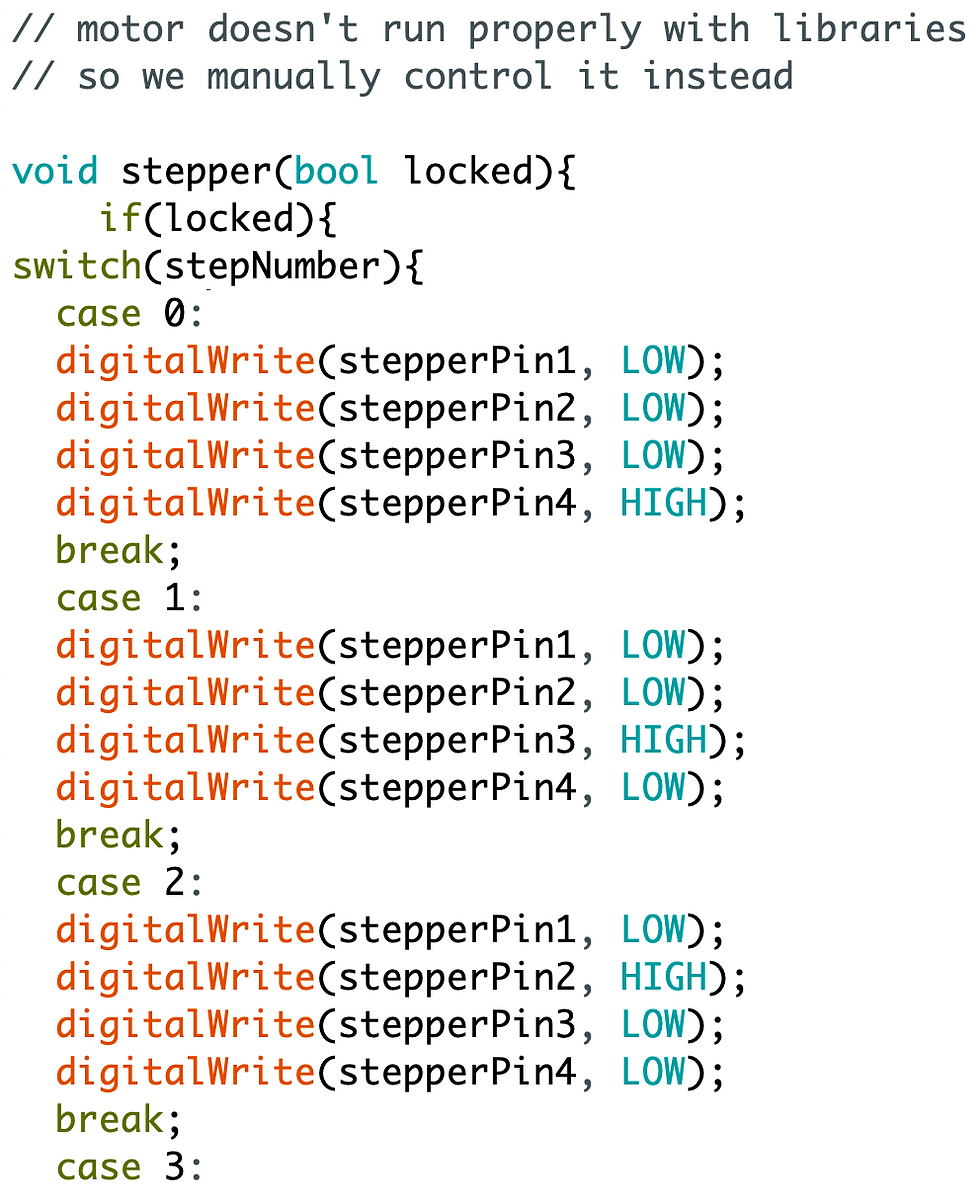
We also wanted to "upgrade" the LEDs visualizing the locker state to a stepper motor with a simple 3D printed gear and rack to give a better sense of an actual locking mechanism. We went with the 28BYJ-48 stepper motor but had some issues with the different libraries where the motor didn't run smoothly. We worked around this by manually controlling the 4 phases of the motor with a loop (see a segment of stepper code below). Knowing how many steps (a loop through each of the 4 phase) is needed for a full rotation of the motor shaft we had mastered the stepper motor.
Lastly we also added the SSD1306 0.96 inch I2C OLED display to improve the UI of the smartLOCKER. After bringing the OLED screen to life we started with the most important thing - to get our dosLHAMAS logo onto the screen. This was done fairly simple by creating a bitmap of the logo with the same resolution as the OLED (128x64 pixels) which fills around half of our Arduino code. Next time we will look into creating the different screens for the locker's different states; available, unlocked (booked) and locked - those easter eggs doesn't find themselves.
LHAMASTE

Comentários